Considering the Height Compensation
- Physical Exam
- Planning the Orthosis
- Model Technique
- Handing Over the Orthosis
- Maintenance
- Products in the Spotlight
- Downloads
FIOR & GENTZ
Gesellschaft für Entwicklung und Vertrieb von orthopädietechnischen Systemen mbH
Dorette-von-Stern-Straße 5
D-21337 Lüneburg
Tel.: +49 4131 24445-0
Fax: +49 4131 24445-57
E-Mail: info(at)fior-gentz.de
Beratung und Technischer Support
Considering the Height Compensation
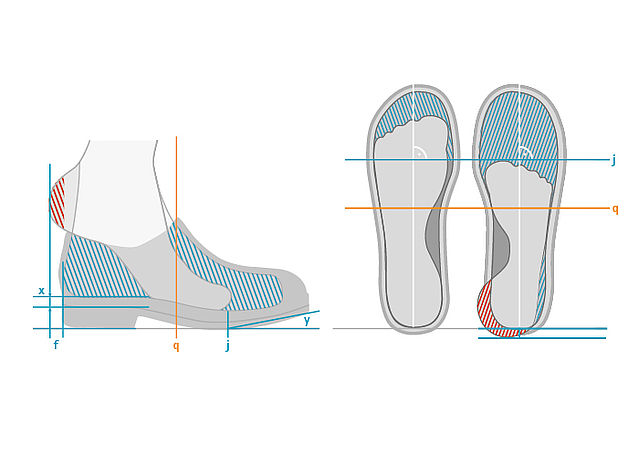
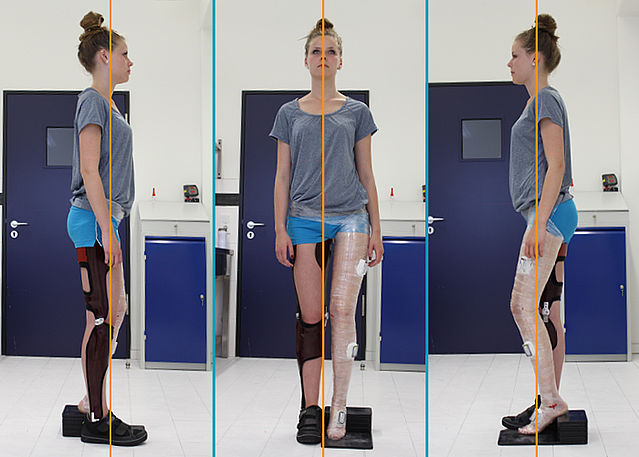
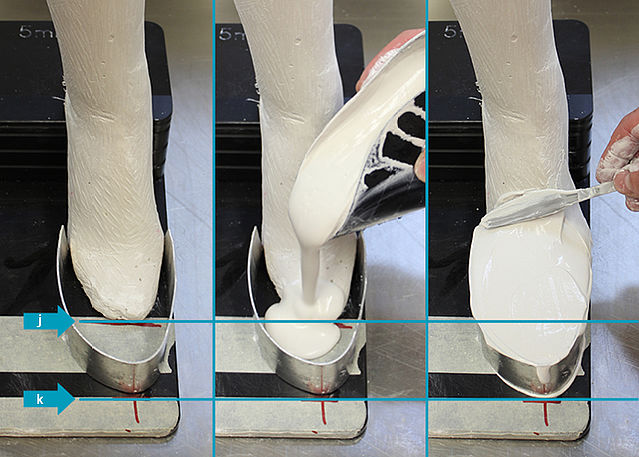
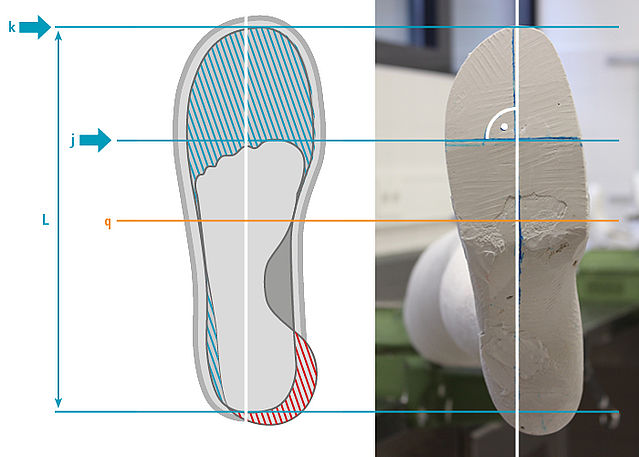
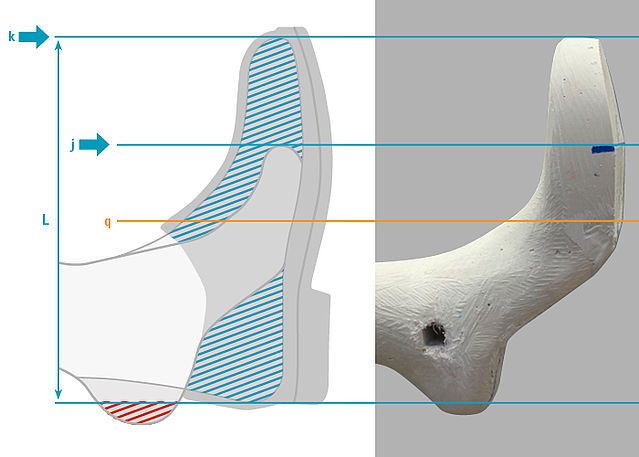
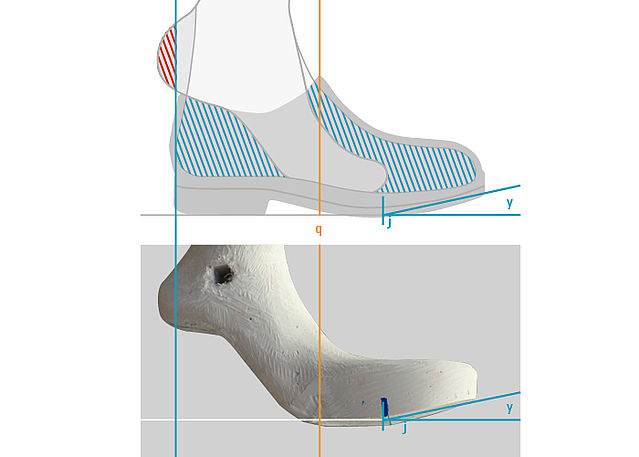
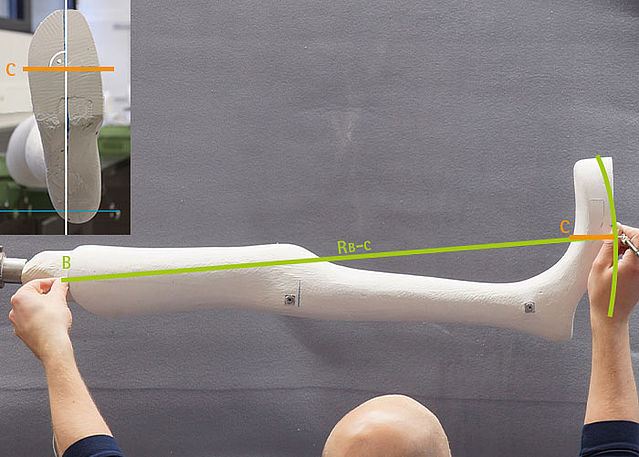
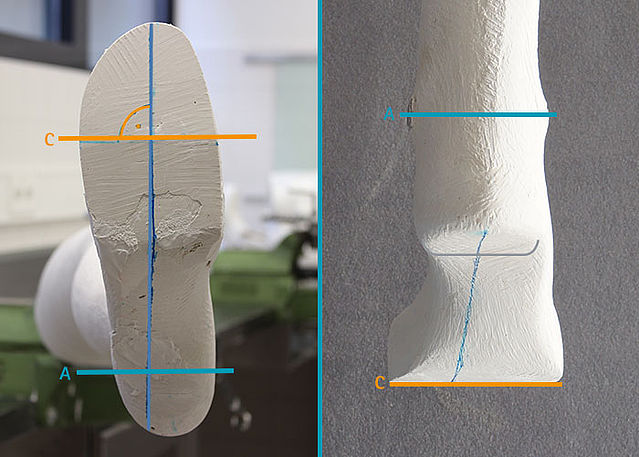
If a height compensation is required, it can be realised, for example, through the orthosis. A height compensation at the orthosis provides the advantage that patients may wear ready-made shoes. The following text describes which steps must be considered when modifying a height compensation, in addition to the steps of the usual modifying technique. One part of the modifying technique is, for example, Making the Negative Cast with e-Cast, where you can find all information regarding the positioning of the plumb line - which is also used in this tutorial - under the subitem “Determining the Ideal Position”.
And, if the final model is finished, you can see how to proceed with a height compensation when producing an orthosis by using the online tutorial Producing a Height Compensation.
-
Considering the Height Compensation
-
Step 1/9
When producing a height compensation, it is essential to create a leverage ratio that is similar to the contralateral side. To do so, the following steps are necessary:
- compensate the volume under the heel and in the forefoot area (blue hatching),
- set the heel back (pink hatching),
- define the mechanical rolling-off line (j),
- consider the heel-to-toe drop (x),
- consider the toe spring (y).
Note: Mark the plumb and rolling-off line of the healthy/unaffected foot on the shoe’s insole (or a copy) and use the insole as a guidance for all further steps
Step 2/9
Setting the Ideal Position
You can set the height of the pitch and the height compensation on the h-Cast. On the contralateral sight, the patient may wear an orthosis or also stand on an h-Cast. If possible, the patient stands in the gait-related normal posture. Here, the stance-related normal posture is described:- feet as close as possible,
- consider the external rotation,
- both legs carry the same load,
- drop the plumb line,
- put the h-Cast back until the plumb line drops correctly and a balanced load on both legs is possible.
Also consider the online tutorial Making the Negative Cast with e-Cast.
Step 3/9
Modifying the Positive Cast
- position the aluminium clasp or similar
- Prolong the forefoot up to k. k stands for the inner shoe dimension and j marks the mechanical rolling-off line.
- fill the form with plaster
- create a smooth transition
- let the model harden
Also consider the online tutorial Making the Positive Cast and Modifying the Positive Cast KAFO.
Step 4/9
Modified positive cast from below:
- j is the mechanical rolling-off line
- k is the point where the aluminium clasp had been positioned
- l is the inner shoe length (the heel protrudes; pink hatching)
Step 5/9
Modified positive cast from lateral:
- j is the mechanical rolling-off line
- k is the point where the aluminium clasp had been positioned
- l is the inner shoe length (the heel protrudes; pink hatching)
Step 6/9
Modified positive cast from lateral while standing:
- the toe spring y must be modified
- it begins at the mechanical rolling-off line j
The toe spring is essential for:
- the foot piece’s fitting in the shoe
- making a physiological terminal stance possible → knee remains extended longer → body's centre of gravity remains at one height → energy is saved
- making a physiological swing phase possible → functional shortening of the leg → swinging freely without compensating (e.g. vaulting, circumduction) possible → energy is saved
Step 7/9
In order to define the toe spring, determine the trochanter (B) first. Tie a string to a pen. The string’s length (R) should match the distance from the trochanter (B) to the rolling-off line (C) (R B - C).
Hold the string at the trochanter (B) and place the pen at the rolling-off line (C). Use the pen to draw the circle line on the positive cast.Step 8/9
Modify the forefoot area of the foot piece corresponding to the drawn marking.
Note: Modify the bottom and the top of the foot piece parallel to one another. This way, the screw clamp can easily be attached in the later work steps.Step 9/9
Mind the parallelism when modifying the foot piece. Modify the heel, the rolling-off area and the forefoot area parallel to the axis/axes.
Last Update: 7 September 2020
FIOR & GENTZ
Gesellschaft für Entwicklung und Vertrieb von orthopädietechnischen Systemen mbH
Dorette-von-Stern-Straße 5
D-21337 Lüneburg
Tel.: +49 4131 24445-0
Fax: +49 4131 24445-57
E-Mail: info(at)fior-gentz.de
Beratung und Technischer Support